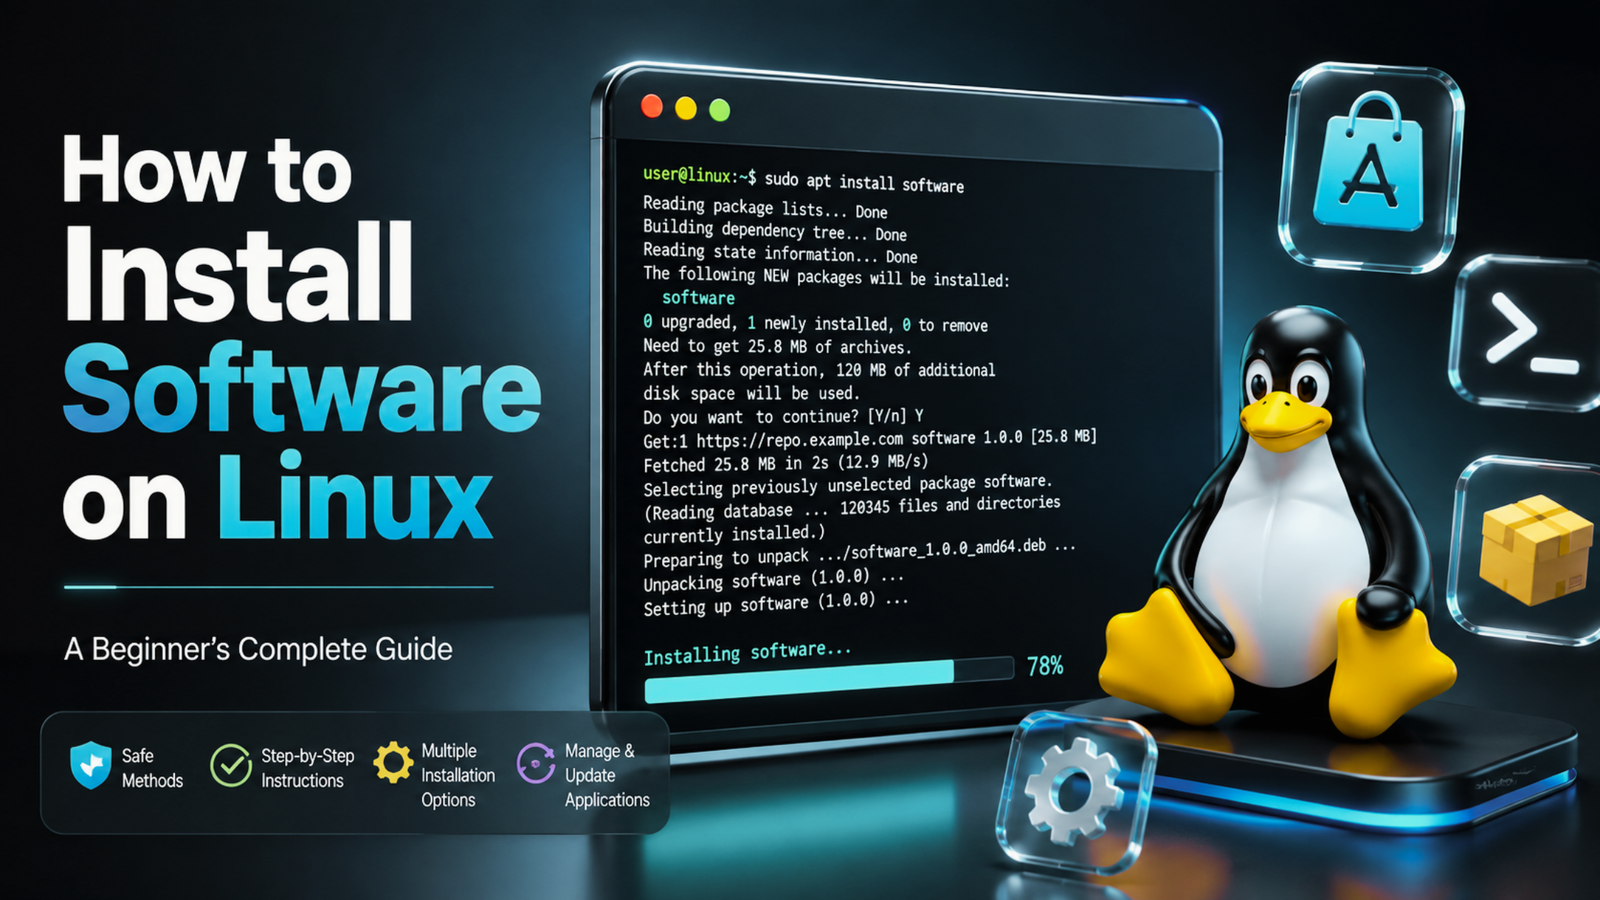
Introduction: How to Install Application Software in Linux
Installing software on Linux can feel overwhelming if you’re a first-time user. Unlike Windows, where you may download an .exe file and run an installer, Linux offers several ways to install applications.
The method you use depends on your Linux distribution, the application you want, and where the software is distributed. You can install an application from a graphical software store, a command-line package manager, a downloaded package file, or a universal format like Flatpak or AppImage.
The good news is that you do not need to understand every method at the same time. For most new users, common applications will be installed by the software center or your distribution’s package manager.
What Does Installing Software Mean in Linux?
When you install an application, Linux places the program’s required files in the appropriate locations on your system. It may also install additional components called dependencies.
Dependencies are libraries or other software packages that an application needs to function properly. A package manager can usually identify and install these components automatically.
For example, if you install a media player, Linux may need to install supporting libraries along with the main application. You normally do not have to find each library yourself when using a package manager.
Why Does Linux Have Multiple Installation Methods?
Linux is not a single operating system. It is available through many distributions, each with its own tools, repositories, and software-management choices.
Some common distributions include:
- Ubuntu
- Debian
- Linux Mint
- Fedora
- Arch Linux
- openSUSE
These distributions can use different package formats and package managers. For example, Ubuntu and Debian commonly use APT, Fedora uses DNF, and Arch Linux uses Pacman.
There are also software formats designed to work across multiple Linux distributions. Flatpak, Snap, and AppImage are common examples.
Which Installation Method Should Beginners Use?
If you are new to Linux, start with your distribution’s software center or official package manager. These options are generally easier because they can handle dependencies, versions, and updates for you.
You can learn other ways when you’re more comfortable. Downloaded packages, Flatpak, Snap, AppImage, and source-code installation each have their own advantages and limitations.
The important thing is to choose the method that matches your Linux distribution and the software you are trying to install.
In the following sections, we will go through these methods step by step, starting with the simplest option and gradually moving toward more advanced techniques.
Before Installing Software: Know Your Linux Distribution
Before installing an application, it is important to know which Linux distribution you are using. A Linux distribution (or distro for short) is a complete operating system built on the Linux kernel. It includes system tools, software repositories, a desktop environment and a package manager.
Knowing your distribution helps you choose the correct installation method and package format. A package designed for Ubuntu may not be suitable for Fedora or Arch Linux.
Common Linux Distributions
There are hundreds of Linux distributions, but some are much more popular than others. For example:
- Ubuntu: Popular with beginners and widely supported by software developers.
- Debian: Known for stability and a massive software repository.
- Linux Mint: Designed to provide a familiar and beginner-friendly desktop experience.
- Fedora: Offers newer technologies and is closely connected to the Red Hat ecosystem.
- Arch Linux: Gives experienced users more control over how the system is configured.
- openSUSE: Provides powerful tools for system management and software installation.
You do not need to memorize all of these distributions. You only need to identify the one running on your computer.
How to Check Your Linux Distribution
The easiest way to identify your distribution is through the terminal. Open the terminal and run:
cat /etc/os-release
You should see information such as the distribution name and version.
For example, an Ubuntu system may show:
NAME= “Ubuntu”
VERSION= “24.04 LTS”
You can also use this command on many Linux systems:
hostnamectl
Look for the Operating System entry in the output.
Why the Distribution Version Matters
Knowing only the distribution name may not always be enough. The version can also affect software compatibility.
For example, a package built for an older Ubuntu release may not work correctly on a newer release. Software repositories are also configured according to your distribution and version.
Before manually downloading a package, check its requirements. Look for information about:
- Supported Linux distributions
- Supported versions
- CPU architecture
- Required dependencies
- Minimum system requirements
This simple check can prevent many installation errors.
Check Your System Architecture
You may also need to know whether your computer uses an x86-64, ARM, or another processor architecture. Most modern desktop and laptop computers use x86-64, while many newer devices use ARM.
To check your architecture, run:
uname -m
A result such as:
x86_64
means the system uses the 64-bit x86 architecture.
If you see:
aarch64
the system is using 64-bit ARM.
This information becomes especially important when downloading software manually. Always choose a package that matches your system architecture.
Check Whether the Application Is Already Available
Before downloading an installer from a website, check whether the application is available through your distribution’s software repository.
For Debian-based systems such as Ubuntu, you can search for a package with:
apt search application-name
Replace application-name with the software you want to find.
If the application is available from an official repository, installing it through the package manager is often the simplest choice. It can also make future updates and removal easier.
Once you know your Linux distribution, version, and system architecture, you are ready to choose the most suitable software installation method.
The Simplest Method: Installing Apps From a Software Store
If you are new to Linux, using a software store is usually the easiest way to install an application. It provides a graphical interface where you can search for software, view basic information, and install it without typing terminal commands.
The exact name and appearance of the software store depend on your Linux distribution and desktop environment. Ubuntu, Linux Mint, Fedora, and other distributions may use different applications, but the basic process is similar.
Step 1: Open the Software Store
Open your applications menu and look for a program named something like Software, App Center, or Software Manager.
Launch it and wait for the available applications to load. Some software stores may take a moment to connect to their repositories when you open them for the first time.
Step 2: Search for an Application
Use the search box to find the application you want to install.
For example, if you want a media player, search for VLC. The store should display matching applications along with information such as the application name, description, publisher, and sometimes screenshots or ratings.
Choose the application that matches what you are looking for.
Step 3: Check the Application Details
Before clicking the install button, take a moment to check the application information.
Depending on your software store, you may see:
- Application description
- Developer or publisher
- Available version
- Required storage space
- Supported permissions
- Screenshots
- Source or repository information
This is particularly useful when several applications have similar names.
Step 4: Install the Application
Click Install or the equivalent button. Linux may ask you to enter your administrator password before continuing.
The software store then downloads the application and any required dependencies. You normally do not need to install these additional components manually.
The amount of time required depends on the application’s size and your internet connection.
Step 5: Launch the Application
After installation finishes, the software store may display an Open button. You can use it to start the application immediately.
You can also close the software store and find the application in your normal applications menu.
Once you launch it, you can create a shortcut or pin it to your desktop or taskbar if your desktop environment supports those options.
Updating Applications Through the Software Store
One advantage of using a software store is that it can also help manage updates.
Open the software store and find an Updates section. You might also see other system updates there, alongside any available application updates.
Keeping applications updated can provide new features, performance improvements, bug fixes, and security patches.
Removing an Application
If you no longer need an application, you can usually remove it from the same software store.
Search for the installed application and choose Remove, Uninstall or similar. You might have to enter your administrator password to confirm the change.
The software manager handles the removal process for you, making this much easier for beginners than manually searching for application files.
What If You Cannot Find the Application?
Not every Linux application is available in the software store. If your search produces no useful results, the application may not be included in your distribution’s enabled repositories.
In that situation, you may be able to install it using another method, such as:
- APT, DNF, or another package manager
- A .deb or .rpm package
- Flatpak
- Snap
- AppImage
- Source code
However, do not download a random installer simply because the software store does not contain the application. Check the developer’s official website or trusted software source first.
For beginners, the software store remains a good starting point because it provides a simple interface and reduces the chance of making mistakes during installation.
Using Linux Package Managers From the Terminal
Once you are comfortable installing applications through a software store, the next step is learning how to use a package manager from the terminal. A package manager is a Linux tool that finds, downloads, installs, updates, and removes software packages.
You do not need to be an advanced Linux user to use one. Most package managers rely on simple commands, and they can often complete an installation faster than a graphical software store.
The important thing to remember is that the command depends on your Linux distribution.
What Is a Package Manager?
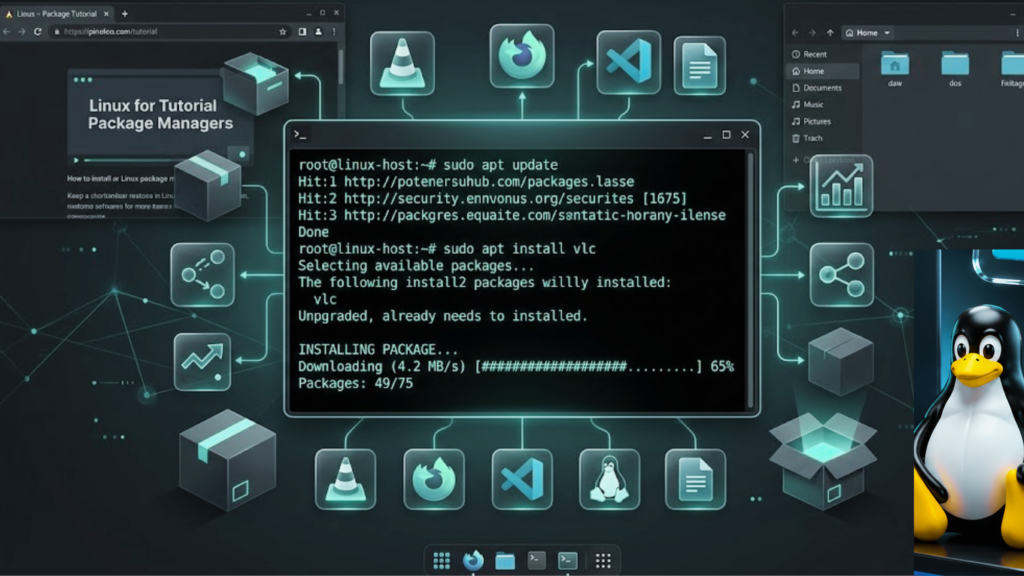
A package manager is responsible for managing software on your Linux system. Instead of manually downloading every file an application needs, the package manager gets the appropriate package from a configured software repository.
It can also resolve dependencies. If an application requires additional libraries or packages, the package manager can identify them and install them as part of the process.
Package managers can usually perform tasks such as:
- Searching for applications
- Installing software
- Updating installed packages
- Removing applications
- Checking available versions
- Managing dependencies
APT for Ubuntu, Debian, and Linux Mint
Ubuntu, Debian, and many related distributions commonly use APT.
Before installing software, it is a good idea to refresh the local package information:
sudo apt updateThis command does not normally upgrade your installed applications. Instead, it retrieves current information about packages available from your configured repositories.
To install an application, use:
sudo apt install application-nameFor example, to install VLC:
sudo apt install vlcAPT may ask you to confirm the installation. Review the information and press Y if you want to continue.
DNF for Fedora
Fedora uses DNF as its standard package management tool.
To install an application, use:
sudo dnf install application-nameFor example:
sudo dnf install vlcDNF handles the required dependencies and downloads the appropriate packages from your configured repositories.
You can also check for available updates with:
sudo dnf check-updatePacman for Arch Linux
Arch Linux uses Pacman for package management.
To install an application, use:
sudo pacman -S application-nameFor example:sudo pacman -S vlc
Pacman will retrieve the package and any required dependencies from the repositories configured on your system.
Search for a Package Before Installing It
You do not always need to know the exact package name. Package managers can search their repositories.
With APT, for example:
apt search vlcThis displays packages matching your search term. You can then identify the package you want and install it with apt install.
The search command differs between package managers, so check the documentation for your distribution if you are using DNF, Pacman, or another system.
Updating Installed Software
Package managers are also useful for keeping your system up to date.
On Ubuntu, Debian, and Linux Mint, you can update available package information and upgrade installed packages with:
sudo apt upgradeThe first command refreshes package information, while the second installs available updates.
On Fedora, you can update installed packages with:
sudo dnf upgrade
For Arch Linux, a complete system upgrade can be performed with:
sudo pacman -SyuAvoid copying update commands from a different distribution. Package management systems work differently, and using the wrong command can cause errors.
Removing Applications From the Terminal
You can also use the package manager to uninstall software.
For APT:
sudo apt remove application-nameFor DNF:
sudo dnf remove application-nameFor Pacman:
sudo pacman -R application-nameThe package manager removes the selected package while managing the related package information according to its own rules.
Why Use a Package Manager?
Installing software through your distribution’s package manager has several advantages. You can obtain software from configured repositories, automatically handle dependencies, and receive updates through the same management system.
It also reduces the need to search the internet for individual installer files.
However, package repositories do not contain every application. If the software you need is unavailable, you may need to use another installation method, which we will cover in the following sections.
Installing Software From Downloaded Package Files
Sometimes the application you need is not available in your Linux distribution’s software store or enabled repositories. In that situation, the software developer may provide a package file that you can download directly.
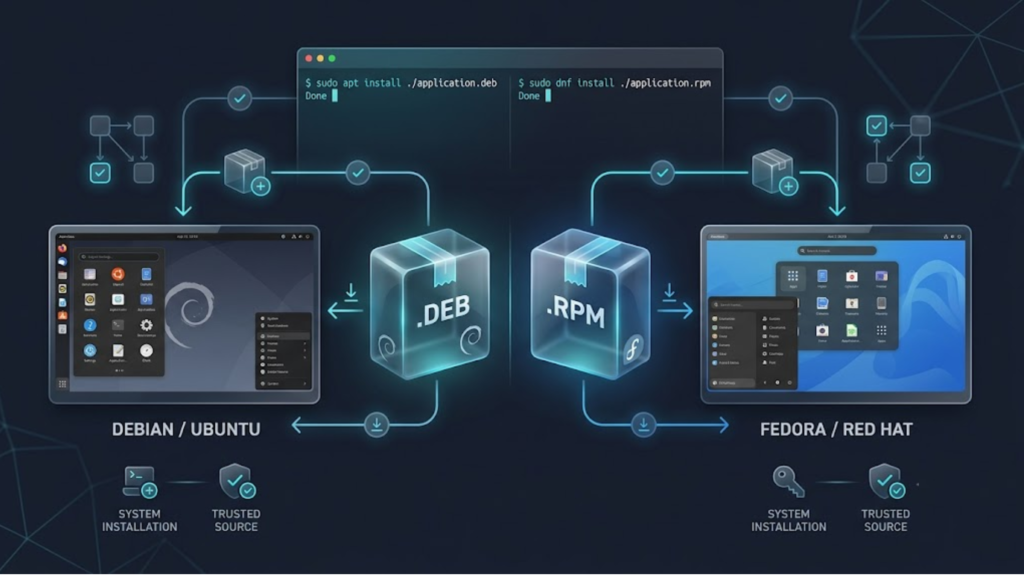
A package file contains the application and information that Linux needs to install it. The format depends on your distribution. Two common formats are .deb and .rpm.
Before downloading any package, make sure it is intended for your Linux distribution and processor architecture.
What Are DEB and RPM Packages?
A DEB package is commonly used by Debian-based distributions, including Ubuntu and Linux Mint.
An RPM package is commonly used by distributions in the Fedora and Red Hat family.
The two formats are not interchangeable in the normal installation process. You should use the package format supported by your distribution.
For example:
| Package format | Common distributions |
| .deb | Debian, Ubuntu, Linux Mint |
| .rpm | Fedora, RHEL, openSUSE and related systems |
This does not mean every distribution in a family uses exactly the same software versions or installation commands. Always check the application’s requirements before installing a downloaded package.
Download the Package From a Trusted Source
If you need to download a package manually, start with the application’s official website whenever possible.
Check the download page for information about:
- Your Linux distribution
- Supported distribution versions
- CPU architecture
- Required dependencies
- Available package format
- Installation instructions
Avoid downloading packages from unknown websites. A package can contain executable software, so installing an untrusted file can put your system at risk.
Installing a DEB Package
If you use Ubuntu, Debian, Linux Mint, or another compatible Debian-based distribution, you may receive a .deb file.
After downloading the file, open a terminal and move to the directory containing it. If the file is located in your Downloads folder, for example:
cd ~/DownloadsYou can then install the package with APT:
sudo apt install ./application.debReplace application.deb with the actual filename.
Using APT for a local DEB package is convenient because it can resolve many required dependencies.
You can also install a DEB package with dpkg:
sudo dpkg -i application.debHowever, dpkg is a lower-level package tool and may require additional steps if dependencies are missing. For many users, installing a local package with APT is simpler.
Installing an RPM Package
Fedora and other RPM-based distributions may provide applications as .rpm files.
After downloading the package, open the terminal and move to its location:
cd ~/DownloadsOn Fedora, you can install a local RPM package using DNF:
sudo dnf install ./application.rpmReplace application.rpm with the actual filename.
DNF can resolve required dependencies from your configured repositories when they are available.
What Happens During Installation?
When you install a package, Linux checks the package information and determines what needs to be added to your system.
Depending on the application, the installer may:
- Copy application files to their appropriate locations.
- Install required dependencies.
- Register the package with the system’s package database.
- Add application shortcuts or menu entries.
- Run required configuration steps.
The exact process depends on the package and your distribution.
What If You Get a Dependency Error?
A dependency error means the application requires another package or a compatible version of a component that is not currently available.
Do not randomly download missing libraries from different websites. First, check the application’s official installation instructions and your distribution’s repositories.
For a locally installed DEB package, you can also try:
sudo apt --fix-broken installThis asks APT to resolve broken dependencies that may have resulted from an incomplete package installation.
If the package was designed for a different distribution or an unsupported version of Linux, fixing dependencies may not be enough. In that situation, look for a package specifically built for your distribution.
Advantages and Disadvantages of Downloaded Packages
Installing a package directly from a developer can be useful when the application is not available in your distribution’s repositories. It may also provide a newer version than the one offered by your distribution.
However, manually installed packages require more attention. You need to verify the source, check compatibility, and understand how updates will be delivered.
If the application is available from your official repository and the packaged version meets your needs, the repository is often the simpler choice.
If you need a newer release or the developer only provides a DEB or RPM package, a downloaded package can be a practical alternative.
Universal Packages: Flatpak and Snap
Traditional Linux packages are often designed for a particular distribution or package-management system. Universal package formats provide another approach by allowing developers to distribute applications across multiple Linux distributions.
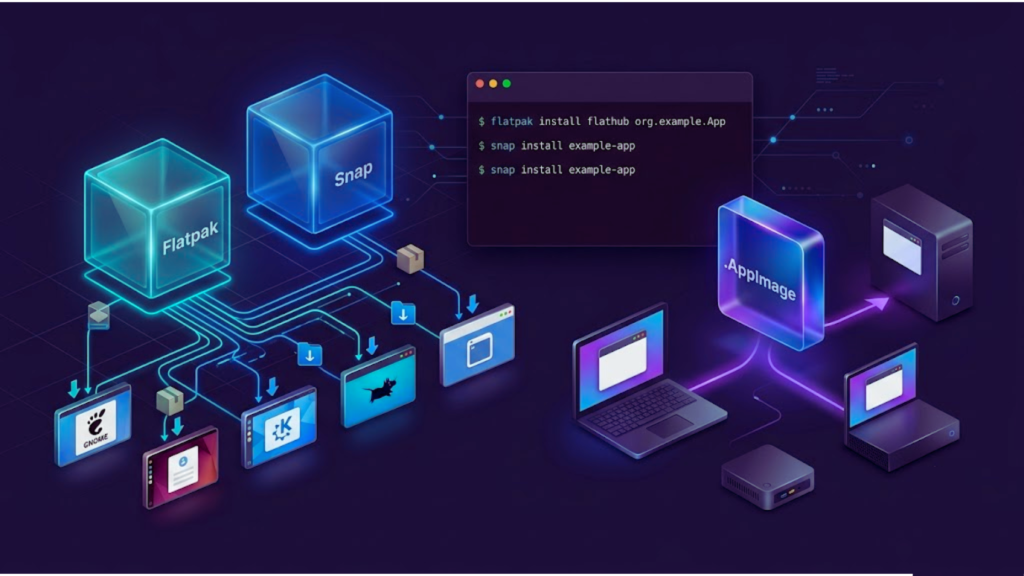
Two of the best-known options are Flatpak and Snap. Both can make it easier to install applications that may not be available in your distribution’s default repositories.
They are especially useful when you want a newer application version or a package maintained separately from your distribution’s normal software repositories.
What Makes Flatpak and Snap Different?
Flatpak and Snap bundle an application with many of the components it needs to run. They also use isolation mechanisms that can limit what an application can access on your system.
However, they are not identical. They use different packaging systems, commands, repositories, and security models.
You should not install both simply because they exist. Choose the format that provides the application you need and works well with your distribution.
Installing Applications With Flatpak
Flatpak is designed to work across a wide range of Linux distributions. Applications are commonly distributed through Flathub, a popular catalog of Flatpak applications.
First, check whether Flatpak is already installed:
flatpak –version
If the command is available, you can search for an application:
flatpak search application-name
After locating the application, install it using its Flatpak application ID.
flatpak install flathub application-id
For example, an application might have an ID similar to:
org.example.Application
Flatpak will show the packages and permissions involved before installation. Review the information and confirm if everything looks correct.
After installation, you can usually launch the application from your desktop’s application menu.
You can also run it from the terminal:
flatpak run application-id
Updating Flatpak Applications
Flatpak can also update installed applications.
To check for and install available updates, use:
flatpak update
This makes it easier to keep Flatpak applications current without manually downloading a new package each time.
Removing a Flatpak Application
To remove an installed Flatpak application:
flatpak uninstall application-id
Flatpak will ask you to confirm the removal if necessary.
Installing Applications With Snap
Snap is another universal application format. It is developed by Canonical and is supported on several Linux distributions.
Check whether Snap is available on your system with:
snap version
If Snap is installed, you can search for an application with:
snap find application-name
To install an application, use:
sudo snap install application-name
For example:
sudo snap install vlc
The exact package name depends on the application available in the Snap store.
Updating Snap Applications
Snap packages are designed to receive updates automatically. You can also check for updates manually:
sudo snap refresh
This checks for newer versions of installed Snap packages and refreshes them when updates are available.
Removing a Snap Application
To remove a Snap package, use:
sudo snap remove application-name
Replace the application name with the package you want to remove.
Flatpak vs. Snap
Both technologies solve a similar problem, but they differ in several ways. Your choice may depend on the application, your distribution, and your preferences.
| Feature | Flatpak | Snap |
| Main focus | Desktop applications | Desktop and server applications |
| Common source | Flathub | Snap Store |
| Distribution support | Broad Linux support | Broad Linux support |
| Application isolation | Yes | Yes |
| Updates | Managed through Flatpak | Generally automatic |
| Typical command | flatpak | snap |
Neither format is automatically the best choice for every application. If the software is available as a well-maintained native package from your distribution, that may still be the simplest option.
When Should You Use Flatpak or Snap?
Universal packages can be useful when:
- The application is missing from your distribution’s repositories.
- You need a newer application release.
- The developer recommends Flatpak or Snap.
- You want an application that works across different Linux distributions.
- You prefer keeping certain applications separate from the system’s traditional packages.
Keep in mind that universal packages can use more disk space because applications may include additional runtime components. They may also behave differently from native packages in areas such as desktop integration, permissions, and filesystem access.
For beginners, the practical rule is simple: use your distribution’s normal package manager when it provides the software you need; consider Flatpak or Snap when they offer a clear advantage.
Running Portable Linux Apps With AppImage
AppImage is a portable application format that provides another way to run software on Linux. Instead of installing a program through a traditional package manager, you usually download a single .AppImage file and run it directly.
This makes AppImage convenient when you want to try an application without adding it to your system’s package database.
Unlike a .deb or .rpm package, an AppImage is generally designed to contain the application and many of the components it needs in one portable file. However, it is not completely independent of the operating system. Some applications may still depend on system libraries or other components.
When Should You Use AppImage?
AppImage can be useful when:
- The application is not available in your distribution’s repositories.
- You want to test an application without a traditional installation.
- The developer provides AppImage as its main Linux download.
- You want to keep the application file in a specific folder and run it directly.
- You need a particular application version without replacing a system package.
It is particularly convenient for users who switch between different Linux distributions because the same AppImage can often run on multiple compatible systems.
Download the AppImage
First, download the AppImage from a trusted source, preferably the application’s official website or project repository.
AppImage files normally have a filename ending in:
AppImage
For example:
Example App-x86_64.AppImage
Pay attention to the architecture shown in the filename. An x86_64 build is intended for most modern 64-bit Intel and AMD computers, while ARM systems generally require an ARM-compatible build.
Make the AppImage Executable
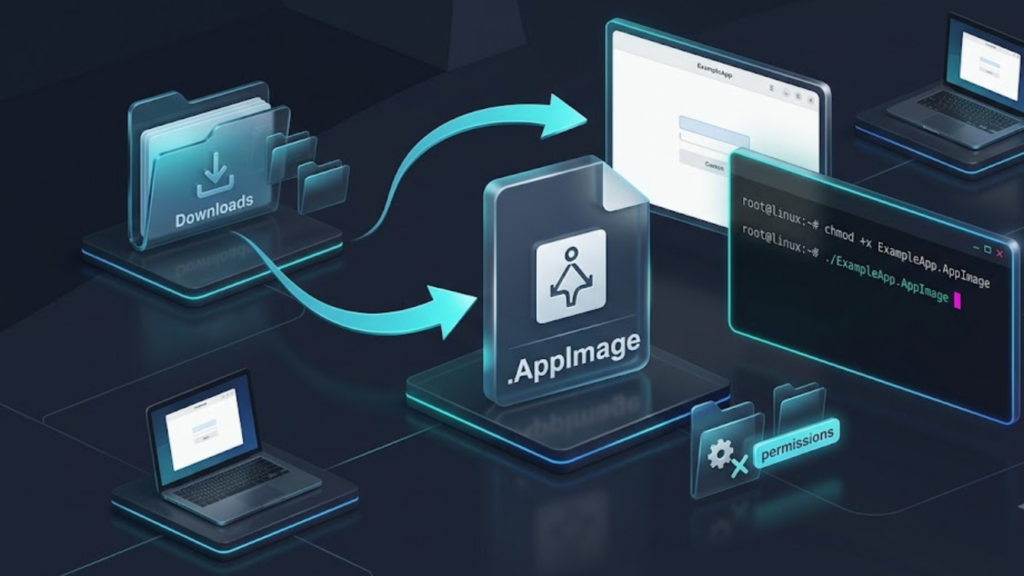
After downloading the file, Linux may not automatically allow it to run as a program.
Open a terminal and move to the directory containing the file. If it is in your Downloads folder:
cd ~/DownloadsThen give the file execute permission:
chmod +x ExampleApp-x86_64.AppImageYou can now launch it with:
./ExampleApp-x86_64.AppImageYou can also enable the executable permission through your file manager if your desktop environment provides that option.
Run the AppImage
Once the file has executable permission, you can usually double-click it to launch the application.
Some AppImages may ask for permission or display a warning before opening. Only allow an AppImage to run if you trust where you obtained it.
The application normally starts without going through a traditional installation wizard.
Where Is the Application Installed?
An AppImage does not necessarily install application files into standard system directories. The AppImage itself can remain wherever you saved it.
mkdir -p ~/ApplicationsThen move your AppImage there:
mv ~/Downloads/ExampleApp-x86_64.AppImage ~/Applications/You can run it directly from that folder:
~/Applications/ExampleApp-x86_64.AppImageSome desktop environments or third-party tools can create application menu entries for AppImages, but this is not guaranteed for every application.
How to Update an AppImage
Updating an AppImage depends on how the developer distributes updates.
Some AppImages include an update mechanism, while others require you to download the latest file manually. If you need to update one manually, you can replace the old AppImage with the newer release.
This is an important difference from traditional package managers, which can normally check repositories and manage application updates automatically.
How to Remove an AppImage
Removing an AppImage is simple because the application is generally represented by the AppImage file itself.
Close the application and delete the file:
rm ~/Applications/ExampleApp-x86_64.AppImageIf you created desktop shortcuts or configuration files separately, those may need to be removed as well.
Advantages and Limitations of AppImage
AppImage is convenient, but it is not the ideal solution for every application.
Advantages include:
- Simple distribution as a single file
- No traditional installation process
- Easy to move between locations
- Useful for testing applications
- Often works across multiple Linux distributions
Limitations include:
- Updates may need to be handled manually
- Applications may not automatically appear in the applications menu
- Some AppImages may require compatible system libraries
- Large applications can consume considerable storage
- You must trust the source of the downloaded file
If an application is available through your distribution’s official repository and you do not need a specific version, the package manager may provide a more convenient long-term solution. AppImage is most useful when portability and simplicity are more important than centralized package management.
Installing Software From Source Code
Installing an application from source code is one of the most advanced software installation methods available on Linux. Instead of downloading a ready-to-run package, you download the application’s human-readable code and build it into a working program on your own computer.
This method is not normally necessary for beginners. Package managers, Flatpak, Snap, and AppImage are usually easier. However, source installation can be useful when an application is unavailable through your normal repositories or when you need a particular version or build configuration.
What Is Source Code?
Source code is the set of instructions written by developers to create an application. A compiler or build system converts this code into executable files that your computer can run.
Developers may publish source code through their official website, a Git repository, or a source-code archive.
Before downloading source code, make sure you are getting it from a trustworthy project. Building software from source does not automatically make it safe.
When Should You Install From Source?
Source installation may make sense when:
- The application is not available in your distribution’s repositories.
- You need a newer version than your repository provides.
- The developer recommends building the application yourself.
- You need specific compilation options.
- You are a developer testing or modifying the application’s code.
For normal desktop applications, try a package manager or another supported installation format first.
Step 1: Read the Project’s Instructions
Never start compiling an unfamiliar project by randomly running commands.
Look for files such as:
- README
- INSTALL
- BUILD
- CONTRIBUTING
These files normally explain the required dependencies and the correct build process.
The instructions are important because different projects use different build systems. There is no single command sequence that works for every Linux application.
Step 2: Install the Required Build Tools
Compiling software requires development tools. The exact requirements depend on the programming language and build system used by the project.
For example, Ubuntu and other Debian-based systems commonly provide a collection of basic development tools through:
sudo apt install build-essential
This can install essential tools like a compiler and make.
However, build-essential does not automatically provide every dependency required by every project. You may need additional development libraries or tools based on the application’s documentation.
Step 3: Download the Source Code
You may receive the source code as an archive such as .tar.gz, .tar.xz, or .zip. You may also clone a project from a Git repository.
For example:
git clone https://example.com/project.git
The actual repository address should come from the project’s official documentation.
If you downloaded a compressed archive, extract it before continuing.
For a .tar.gz archive, you can use:
tar -xzf application.tar.gz
Then move into the extracted directory:
cd application
Step 4: Identify the Build System
This is where source installation becomes different from installing a normal package.
A project might use CMake, Meson, Autotools, Cargo, Make, Python packaging tools, or another build system.
Look at the project’s documentation to determine which one it uses.
For example, an older project using Autotools may provide a configure script. The process may look like:
./configure
make
sudo make install
The ./configure command checks your system and prepares the project for compilation.
If it reports a missing dependency, install the required development package before trying again.
Step 5: Build the Application
Once the project has been configured successfully, the build system can compile the source code.
For a traditional Make-based project:
make
Depending on the project and your hardware, compilation may take anywhere from a few seconds to several minutes.
You may see a large amount of text in the terminal while the compiler processes the source files. That is normal.
If the build fails, take a close look at the last part of the output. It usually points out a missing dependency, an unsupported compiler option, or some other configuration issue.
Step 6: Install the Compiled Application
If compilation finishes successfully, the project’s documentation will tell you how to install the resulting files.
For a traditional Make-based project, this may be:
sudo make install
The exact installation location depends on the project’s configuration.
Do not assume that every project supports make install. Some build systems use a different command, and some projects recommend creating a package instead of installing files directly.
An Important Issue With Source Installations
Applications installed directly from source may not be tracked by your normal package manager.
For example, if you install an application using:
sudo make install
your distribution’s package manager may not know about the files that were installed.
This means the application may not receive updates through your normal system update process. You may need to download the newer source code, rebuild it, and install the new version yourself.
This is one of the main reasons package managers are generally preferable for everyday software.
Keep the Source Code and Build Notes
If you install software from source, keep the project’s documentation and note how you built it.
This can make future updates or removal easier.
Some projects provide an uninstall command, but others do not. If the project does not provide a reliable removal method, manually deleting installed files can be risky because you may not know exactly which files belong to the application.
For this reason, advanced users may choose to build software into a package first so that the package manager can track the installation.
Source Installation Is Powerful but Advanced
Installing from source gives you more control, but it also gives you more responsibility. You need to understand dependencies, build tools, compilation errors, installation locations, and future updates.
For beginners, the best approach is to treat source installation as a last-resort or specialized method, not the default way to install applications.
If a trusted package, Flatpak, Snap, or AppImage is available and meets your needs, one of those options will usually require less maintenance.
How to Choose the Right Installation Method
Linux gives you several ways to install the same application, but that does not mean every method is equally suitable for every situation. The best choice depends on your Linux distribution, the software you need, how often it receives updates, and how much control you want over the installation.
For most beginners, there is a simple rule: start with the software provided by your distribution’s official repositories. If the application is not available there, consider Flatpak, Snap, AppImage, or an official package from the developer.
Use the Software Store for Simplicity
The graphical software store is usually the best starting point if you are new to Linux.
It is a good choice when you want to:
- Search for applications visually
- Install software without memorizing commands
- View basic application information
- Remove applications easily
- Manage available updates from a graphical interface
The main limitation is that some applications may not be available through your distribution’s software store.
Use the Package Manager for Everyday Software
A package manager such as APT, DNF, or Pacman is an excellent choice when you want more control without making installation unnecessarily complicated.
Package managers can automatically handle dependencies and keep track of installed packages. They can also make software updates and removal easier.
For example, an Ubuntu user can install an available application with:
sudo apt install application-name
If the software is available through your distribution’s official repositories, this is often one of the best options.
Choose Flatpak or Snap for Wider Software Availability
Flatpak and Snap can be useful when an application is missing from your distribution’s standard repositories.
They can also provide newer application releases or allow developers to distribute the same software across different Linux distributions.
Consider these formats when:
- The application is not available as a native package.
- The developer officially recommends one of them.
- You want a newer version.
- You prefer an application that is managed separately from traditional system packages.
Check the application’s permissions and source before installing it, especially when using third-party repositories.
Use AppImage for Portability
AppImage is a convenient choice when you want to download an application and run it directly without a traditional installation process.
It can be useful for testing software or keeping a particular application version separate from your system packages.
However, AppImages are not managed by your distribution’s package manager. Updates may therefore require you to download a newer AppImage manually.
Use Downloaded DEB or RPM Packages Carefully
A .deb or .rpm package can be a good option when the application’s developer officially provides a package for your distribution.
For example, a Debian-based system may use a .deb package, while Fedora commonly uses .rpm.
Before installing one, verify:
- The package comes from a trusted source.
- It supports your Linux distribution.
- It supports your distribution version.
- It matches your CPU architecture.
- Its dependencies are supported.
Do not install a package simply because its filename looks correct. A package built for a different Linux release can cause compatibility problems.
Use Source Code Only When Necessary
Installing from source gives you the greatest amount of control, but it also requires the most technical work.
Choose source installation when you specifically need it, such as when:
- No suitable package is available.
- You need a special build configuration.
- You are developing or modifying the application.
- The project’s official documentation recommends building it yourself.
For everyday applications, source installation is usually unnecessary.
A Simple Decision Guide
You can use this basic order when deciding how to install an application:
1. Is it available in your software store?
Start there if you want the easiest graphical installation.
2. Is it available from your official package repository?
Use APT, DNF, Pacman, or your distribution’s package manager.
3. Does the developer officially provide Flatpak or Snap?
Consider that option if you want an alternative package format.
4. Is an official AppImage available?
Use it when portability or a standalone application is useful.
5. Does the developer provide a compatible DEB or RPM package?
Verify compatibility and install it using the appropriate package-management tool.
6. Is source code the only practical option?
Follow the project’s official build instructions and install the required dependencies.
Think About Updates and Maintenance
Installation is only the beginning. You should also consider how the application will be updated later.
A package installed through your distribution’s repositories can usually be updated along with your other system packages. Flatpak and Snap have their own update mechanisms. AppImages and source installations may require more manual maintenance.
For this reason, the easiest installation method is not always the one that requires the fewest clicks. A method that provides reliable updates and clean removal may save you more time in the long run.
When in doubt, choose a trusted, officially supported installation method that your distribution can manage easily.
Troubleshooting Common Linux Installation Problems
Even when you follow the correct installation steps, you may occasionally encounter an error. Linux installation problems can happen because of missing dependencies, incompatible packages, incorrect permissions, repository issues, or unsupported software versions.
The good news is that most errors provide clues about what went wrong. Instead of repeatedly running commands, read the error message and identify the part that needs attention.
Package Cannot Be Found
You may see an error saying that a package cannot be located or found.
For example, APT might report:
E: Unable to locate package application-name
This usually means the package is not available in your currently configured repositories, or the package name is incorrect.
First, check the spelling of the package name. You can also search for it:
apt search application-name
If the application does not appear, check whether the developer provides installation instructions for your Linux distribution.
Dependency Problems
Applications sometimes require other packages to function. These additional packages are called dependencies.
If a required dependency is missing or incompatible, the installation may fail.
On Debian-based systems, you can try:
sudo apt update
sudo apt --fix-broken install
This can help repair incomplete package installations and resolve available dependencies.
Do not randomly download individual dependency files from unknown websites. Use your distribution’s repositories whenever possible.
Permission Denied
Linux protects important system files from unauthorized changes. As a result, some installation commands require administrator privileges.
If you see a permission error while installing system software, the command may need sudo.
For example:
sudo apt install application-name
The sudo command temporarily gives the command administrator privileges after you authenticate.
However, do not add sudo to every command without understanding what it does. Administrator access allows a command to make significant changes to your system.
Package Is Not Compatible
A downloaded package may fail because it was created for a different Linux distribution, release, or processor architecture.
For example, installing an RPM package intended for Fedora on a Debian-based system is not normally the correct approach.
Before downloading a package, check the developer’s requirements and confirm:
- Linux distribution
- Distribution version
- CPU architecture
- Package format
- Required libraries
If the developer provides several downloads, select the one that matches your system.
Broken Package Installation
Sometimes an installation is interrupted because of a power failure, lost internet connection, or another unexpected problem.
On Debian-based systems, you can first update package information:
sudo apt updateThen try to repair incomplete dependencies:
sudo apt –fix-broken install
After the system is repaired, you can try installing the application again.
If the problem continues, read the complete error message rather than repeatedly running the same command.
Repository Errors
Package managers depend on software repositories. If a repository is unavailable, incorrectly configured, or no longer supports your Linux version, package installation and updates may fail.
You may see errors involving repository URLs, package indexes, signatures, or network connections.
Check your internet connection first. Then verify that the repository is intended for your Linux distribution and version.
Avoid adding random third-party repositories just to make an installation command work. An incorrect repository can introduce incompatible packages or security risks.
The Application Installs but Will Not Start
An application can sometimes install successfully but fail when you try to launch it.
Possible causes include:
- Missing runtime libraries
- Incorrect permissions
- Unsupported system libraries
- Configuration problems
- Graphics or hardware compatibility issues
- A damaged application package
Try launching the application from the terminal. Instead of only showing that the application failed, the terminal may display a useful error message.
For example:
application-name
Read the output carefully. Search for the exact error message in the application’s official documentation or support resources.
AppImage Will Not Run
If an AppImage does nothing when you double-click it, it may not have executable permission.
Open a terminal, move to the directory containing the file, and run:
chmod +x application.AppImage
Then launch it:
./application.AppImage
If it still fails, run it from the terminal and examine the error message. The AppImage may require system libraries that are not available on your Linux installation.
Flatpak or Snap Application Has Problems
Flatpak and Snap applications use their own package-management systems, so their troubleshooting commands are different from APT or DNF.
For Flatpak, you can check installed applications with:
flatpak list
You can also update Flatpak applications with:
flatpak update
For Snap, check installed packages with:
snap list
and refresh them with:
sudo snap refresh
If an application still does not work, check the application’s official documentation for known compatibility or permission issues.
Source Compilation Fails
When compiling software from source, errors are often related to missing development tools, libraries, or incompatible versions.
If a command such as:
./configure
or:
make
fails, read the final lines of the terminal output carefully.
The error may tell you exactly what is missing. Check the project’s README or installation documentation before installing anything manually.
Do not assume that every source project uses the traditional ./configure, make, and make install process. Modern projects may use CMake, Meson, Cargo, or another build system.
When You Should Stop and Investigate
Not every installation error should be fixed by forcing the installation to continue.
Stop and investigate if:
- The package comes from an unknown source.
- The package targets a different distribution.
- The system reports major dependency conflicts.
- A repository is requesting that you turn off essential security measures.
- You are unsure what a command containing sudo will change.
- The installation instructions conflict with your distribution’s documentation.
Taking a few minutes to understand an error is usually safer than forcing an installation that could leave your system in an unstable state.
Keep the Error Message
When asking for help with a Linux installation problem, copy the exact error message instead of simply saying that the application does not work.
Also include useful information such as your Linux distribution and version.
For example:
cat /etc/os-release
This gives other users or support teams enough information to determine whether the problem is related to your operating system, package version, dependencies, or installation method.
In Linux, error messages are often the best starting point for finding a solution. Read them carefully, make one change at a time, and avoid commands you do not understand.
Managing Installed Applications
Installing an application is only one part of software management on Linux. After an application is installed, you may need to update it, check its version, remove it, or find out how much software is taking up space.
The best way to manage an application depends on how you originally installed it. A package installed with APT should generally be managed with APT, while Flatpak, Snap, and AppImage applications have their own management methods.
Check Whether an Application Is Installed
If you are not sure whether an application is installed, you can check through your software store or use the terminal.
On Debian-based systems, you can search installed packages with:
apt list –installed
To look for a specific package:
apt list –installed | grep application-name
You can also check whether a command is available:
which application-name
The exact result depends on the application and how it was installed.
Check an Application’s Version
Knowing the installed version can help when troubleshooting compatibility problems or deciding whether an update is needed.
Many applications provide a version option such as:
application-name –version
Some programs use:
application-name -v
You can also check package information through your package manager.
For example, on Debian-based systems:
apt policy application-name
This can show information about the installed and available package versions.
Keep Applications Updated
Regular updates are important because they can include security fixes, bug fixes, performance improvements, and new features.
If you installed software through your distribution’s package manager, update it using the same package management system.
For Ubuntu and Debian-based distributions:
sudo apt updateFor Fedora:
sudo dnf upgradeFor Arch Linux:
sudo pacman -SyuFlatpak applications can be updated with:
flatpak updateSnap applications are generally updated automatically, but you can manually check for updates with:
sudo snap refreshAppImage updates depend on the application. Some provide their own update system, while others require you to download the latest version manually.
Remove Applications You No Longer Need
Removing unused applications can free storage and keep your system organized.
For an APT package:
sudo apt remove application-nameFor a DNF package:
sudo dnf remove application-nameFor an Arch Linux package:
sudo pacman -R application-nameFlatpak applications can be removed with:
flatpak uninstall application-idSnap applications can be removed with:
sudo snap remove application-nameIf you are removing an AppImage, you normally only need to delete the AppImage file. Any additional configuration or shortcuts created by the application may need separate cleanup.
Be Careful When Removing Packages
Do not remove packages simply because their names look unfamiliar. Some packages are components required by other applications or by the Linux desktop itself.
When using a package manager, review the list of packages it plans to remove before confirming the operation. If the command proposes removing a large number of important system packages, stop and investigate.
Clean Up Unused Packages
Over time, your system may contain packages that were installed as dependencies but are no longer required.
On Debian-based systems, APT can identify packages that are no longer needed:
sudo apt autoremove
Review the proposed changes before confirming them. Do not remove packages blindly, especially on a system you rely on for important work.
Keep Your Software Sources Organized
The software sources you use affect which applications and updates your package manager can access.
For everyday software, official repositories are generally the easiest to maintain. If you add third-party repositories, make sure they are trustworthy and compatible with your Linux distribution.
Having too many unrelated repositories can sometimes create package conflicts or make upgrades more complicated.
Maintain a Simple Software Management Routine
You do not need to constantly manage your applications. A simple routine is usually enough:
- Install software from a trusted source.
- Use the same management system for future updates.
- Remove applications you no longer need.
- Check application versions when troubleshooting.
- Review major package changes before confirming them.
- Keep your Linux system and important applications updated.
The most important rule is to manage software using the system through which it was installed whenever possible. This keeps applications easier to update, troubleshoot, and remove later.
Frequently Asked Questions
What is the easiest way to install software on Linux?
For beginners, the easiest option is usually the built-in software store. You can search for an application, review its information, and click Install without using terminal commands.
Can I install software on Linux without using the terminal?
Yes. Most popular Linux distributions provide a graphical software center. You can use it to find, install, update, and remove many applications without opening the terminal.
Which package manager does Linux use?
It depends on your distribution. Ubuntu and Debian commonly use APT, Fedora uses DNF, and Arch Linux uses Pacman. Other distributions may use different package-management systems.
Is it safe to install software from the terminal?
Using the terminal is generally safe when you use trusted repositories and understand the commands you are running. The terminal itself is not dangerous, but commands using administrator privileges can make significant changes to your system.
What is a DEB file?
A DEB file is a software package format commonly used by Debian-based distributions such as Debian, Ubuntu, and Linux Mint. It contains the files and package information needed to install an application.
What is an RPM file?
RPM is a package format commonly used by Fedora and other distributions in the Red Hat family. You should use a package that is compatible with your particular distribution and version.
Is Flatpak better than Snap?
Neither is universally better. Flatpak and Snap use different technologies and software ecosystems. The better choice depends on the application, your distribution, and which format the developer supports.
What is an AppImage used for?
AppImage provides a portable way to run many Linux applications. Instead of installing the application through a traditional package manager, you generally download an AppImage, give it executable permission, and run it.
Should beginners install software from source code?
Usually not. Installing from source requires more technical knowledge and can make updates and removal more complicated. Beginners should normally start with their distribution’s package manager or software store.
Why can’t I find an application in my software store?
The application may not be included in your distribution’s enabled repositories. It may also be distributed through Flatpak, Snap, AppImage, a DEB or RPM package, or source code instead.
How do I keep Linux applications updated?
The method depends on how the application was installed. Software installed through a package manager can usually be updated with normal system updates. Flatpak and Snap have their own update commands, while AppImage and source installations may require more manual updates.
Can I install Windows .exe applications on Linux?
A Windows .exe file is not normally a native Linux application. Some Windows programs can run through compatibility tools such as Wine, but compatibility varies between applications. When a native Linux version is available, it is usually the better choice.
Why does Linux ask for my password when installing software?
Linux uses administrator permissions to protect important system files. Commands that install or modify system-wide software may require authentication before they can make those changes.
Final Thoughts
Installing software on Linux may look complicated at first because there are several methods available. Once you understand what each method does, choosing the right one becomes much easier.
For most beginners, the best starting point is the software store or your distribution’s official package manager. These methods simplify installation, handle dependencies, and make future updates easier.
When an application is not available through your normal repositories, you have other options. Flatpak and Snap can provide applications across different Linux distributions, while AppImage offers a convenient portable approach. Downloaded DEB or RPM packages can also be useful when they are officially provided for your system.
Installing software from source code is the most advanced option and is usually better suited to developers or situations where no suitable prebuilt package exists.
Whatever method you choose, download software from trustworthy sources, check compatibility with your Linux distribution, and keep important applications updated. With these basic practices, installing and managing software on Linux becomes a straightforward part of everyday system use.
Also Read: How to install a software on a computerAbout the Author