What Is an ISO File and How Does It Work?
An ISO file is a digital image of a CD, DVD, or other optical disc. It stores the files and folders from the original disc inside one file. Software developers often use ISO files to package and distribute complete software installers without relying on physical discs.
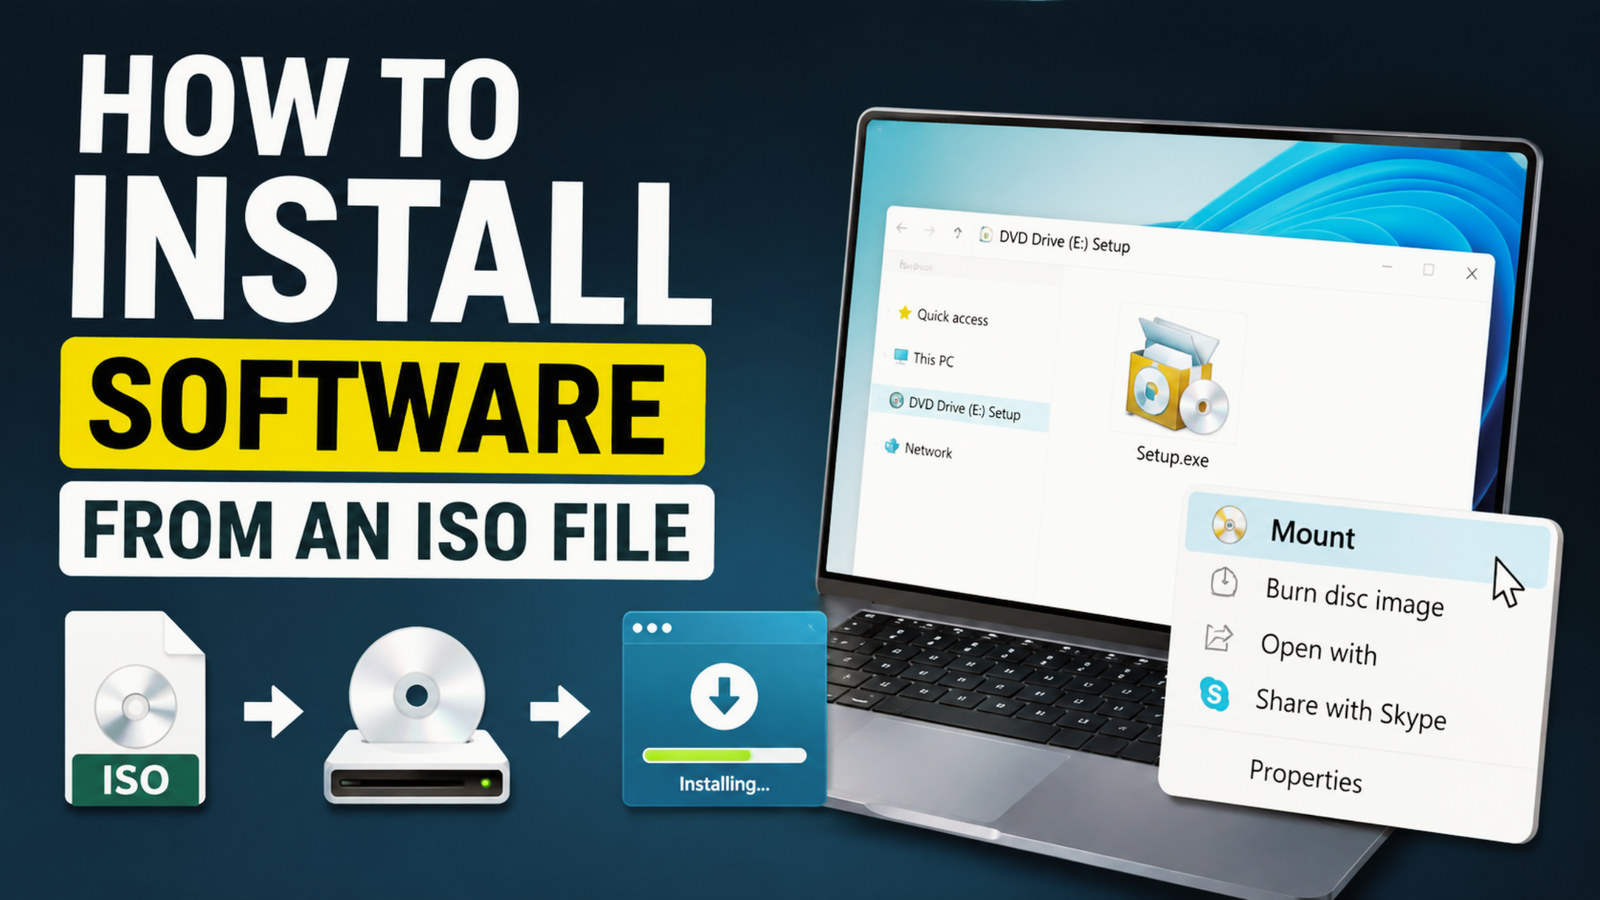
When you download software as an ISO, you usually do not install the ISO file itself. Instead, you access the files inside it. Windows can do this by mounting the ISO as a virtual DVD drive, while older Windows versions may require you to extract its contents with a tool such as 7-Zip.
Once the ISO is mounted or extracted, you can open its contents and look for an installer such as setup.exe. Running that installer starts the normal software installation process.
ISO files are useful because they keep an entire installation disc together in a single file. You can store the ISO on your hard drive, transfer it to another computer, or use it later when you need to reinstall the software.
What to Do Before Installing Software from an ISO File
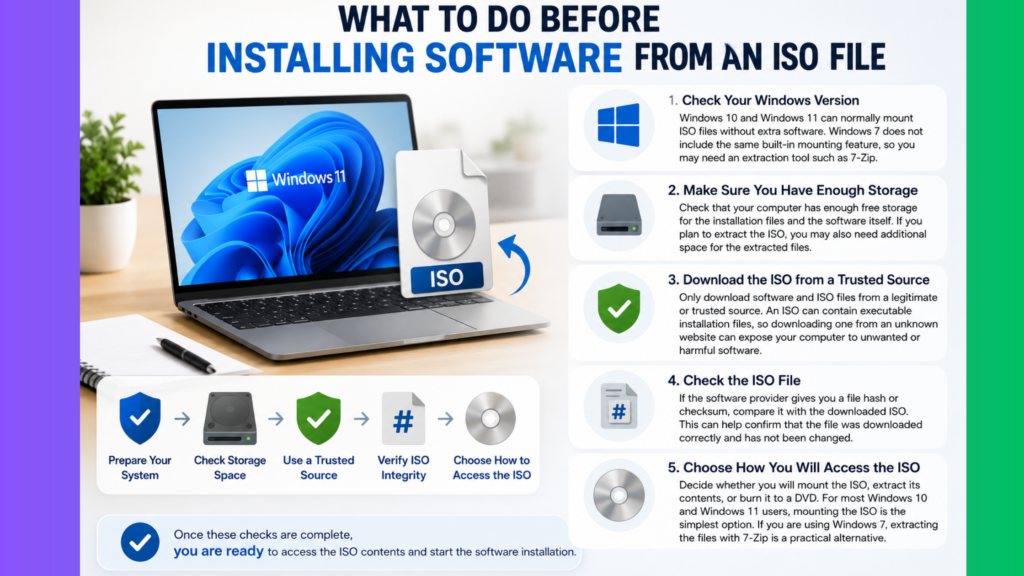
Before you install software from an ISO file, take a few minutes to prepare your computer. These simple checks can prevent installation errors and make the process smoother.
Check Your Windows Version
Start by checking which version of Windows is installed on your computer. Windows 10 and Windows 11 can normally mount ISO files without extra software. Windows 7 does not include the same built-in mounting feature, so you may need an extraction tool such as 7-Zip.
Make Sure You Have Enough Storage
Check that your computer has enough free storage for the installation files and the software itself. If you plan to extract the ISO, you may also need additional space for the extracted files.
Download the ISO from a Trusted Source
Only download software and ISO files from a legitimate or trusted source. An ISO can contain executable installation files, so downloading one from an unknown website can expose your computer to unwanted or harmful software.
Check the ISO File
If the software provider gives you a file hash or checksum, compare it with the downloaded ISO. This can help confirm that the file was downloaded correctly and has not been changed.
Choose How You Will Access the ISO
Decide whether you will mount the ISO, extract its contents, or burn it to a DVD. For most Windows 10 and Windows 11 users, mounting the ISO is the simplest option. If you are using Windows 7, extracting the files with 7-Zip is a practical alternative.
Once these checks are complete, you are ready to access the ISO contents and start the software installation.
How to Install Software from an ISO File on Windows 11
Windows 11 lets you mount ISO files directly, so you don’t need a separate mounting tool. Windows treats the ISO as a virtual DVD, so you can access its installation files directly.
Step 1: Find the ISO File
Open File Explorer and go to the folder where you saved the ISO file. It may be in your Downloads folder if you downloaded it from the internet.
Step 2: Mount the ISO File
Right-click the ISO file and choose Mount. Windows will create a virtual DVD drive for the image.
You can also double-click the ISO file in many Windows 11 configurations. If it is mounted successfully, a new drive will appear under This PC.
Step 3: Open the Virtual Drive
Open This PC in File Explorer and find the newly created DVD drive. Open the drive to access the files inside the ISO.
Step 4: Start the Installation
Look for an installation file such as setup.exe, install.exe, or another installer provided by the software developer. Double-click the appropriate installer file to begin the setup process.
Step 5: Follow the Setup Instructions
The installation wizard will walk you through the remaining steps. You may need to accept a license agreement, select an installation location, or choose additional components.
Step 6: Eject the ISO After Installation
When the installation is finished, return to this PC. Right-click the virtual DVD drive and select Eject. This unmounts the ISO without deleting the original file from your computer.
How to Install Software from an ISO File on Windows 10
Windows 10 also includes built-in support for mounting ISO files. You can therefore access most software installation images without installing a separate ISO mounting application.
Step 1: Locate the ISO
Open File Explorer and find the ISO file you downloaded.
Step 2: Mount the Image
Right-click the ISO file and select Mount. Windows will load the image as a virtual DVD drive.
If the Mount option is not visible, double-clicking the ISO may mount it automatically, depending on your file associations.
Step 3: Open the Mounted Drive
Go to This PC and find the newly created virtual DVD drive. Open it to see the installation files.
Step 4: Run the Installer
Find the main setup file, commonly named setup.exe. Double-click the installer to start the software setup.
Follow the on-screen prompts to finish the installation. The available options may differ depending on the software.
Step 5: Complete the Installation
Wait for the installer to finish copying and configuring the software. Once the process is complete, you can launch the newly installed application from the Start menu or its desktop shortcut.
Step 6: Unmount the ISO
After you finish installing the software, open This PC, right-click the virtual DVD drive, and choose Eject. The ISO remains saved on your computer, but its virtual drive is removed.
How to Install Software from an ISO File on Windows 7
Windows 7 does not have the same built-in ISO mounting feature found in newer Windows versions. If you have an ISO containing software you want to install, you can extract its contents first and then run the installer.
The easiest approach is to use a file extraction utility such as 7-Zip.
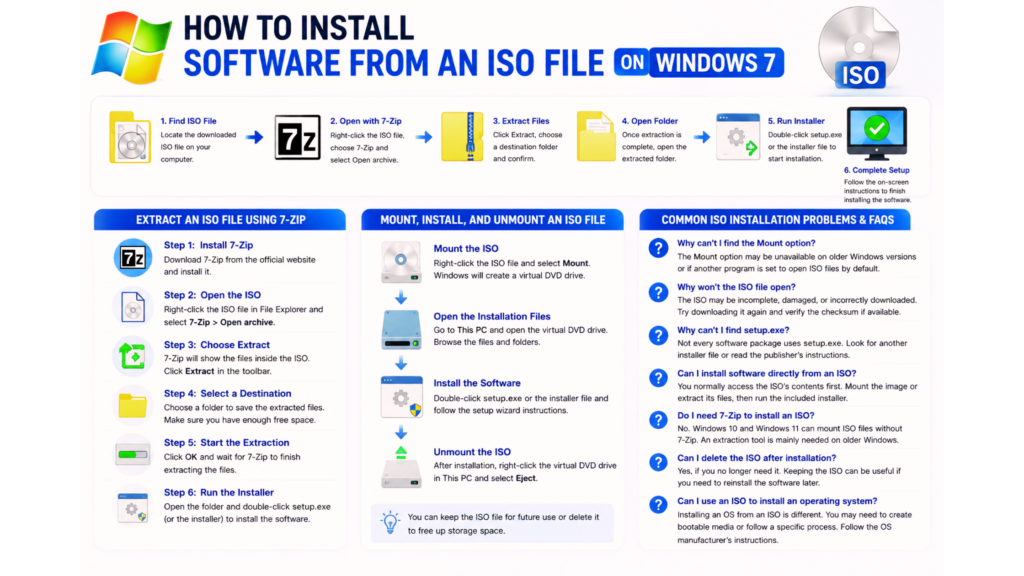
- Find the ISO file: Open
Windows Explorerand locate the downloaded ISO. - Open it with 7-Zip: Right-click the file, choose
7-Zip, and selectOpen archive. - Extract the files: Click
Extract, choose a destination folder, and confirm the extraction. - Open the extracted folder: Wait until the process finishes, then open the folder where the files were saved.
- Start the installer: Look for
setup.exeor another installation file and double-click it. - Complete the setup: Follow the installation wizard’s instructions to finish installing the software.
After installation, you can keep the extracted files if you need them later or remove them to recover storage space.
How to Extract an ISO File Using 7-Zip
7-Zip can open ISO files and copy their contents to a normal folder. This is especially useful when your Windows version cannot mount the ISO directly.
Step 1: Install 7-Zip
Download 7-Zip from its official source and install the version appropriate for your Windows system.
Step 2: Open the ISO
Locate the ISO file in File Explorer. Right-click it and select 7-Zip > Open archive.
Step 3: Choose Extract
Once 7-Zip displays the files inside the ISO, click Extract in the toolbar.
Step 4: Select a Destination
Choose a folder to save the extracted files. Make sure the drive has enough free space.
Step 5: Start the Extraction
Click OK and allow 7-Zip to finish copying the files. The extraction time depends on the ISO’s size and your computer’s storage speed.
Step 6: Run the Installer
Open the destination folder and find the software’s installation file. Usually, this is setup.exe, but the name can vary. Open it and follow the setup instructions.
How to Mount, Install, and Unmount an ISO File
Mounting an ISO creates a virtual optical drive that behaves much like a physical DVD drive. This is usually the most convenient method when your Windows version supports it.
Mount the ISO
Find the ISO file in File Explorer, right-click it, and select Mount. Windows will create a virtual drive and make the ISO’s contents available through File Explorer.
Open the Installation Files
Go to This PC and open the new virtual DVD drive. Browse through the folders until you find the software’s installer.
Install the Software
Double-click setup.exe or the appropriate installation program. Follow the instructions displayed by the setup wizard until the installation is complete.
Unmount the ISO
Afterward, return to This PC, right-click the virtual DVD drive, and select Eject. This removes the virtual drive while leaving the original ISO file untouched.
You can keep the ISO if you expect to reinstall the software later. Otherwise, you can delete it to free up storage space.
Common ISO Installation Problems and FAQs
Why can’t I find the Mount option?
The Mount option may be unavailable on older Windows versions or if another program is set to open ISO files by default. On Windows 7, extracting the ISO with 7-Zip is an alternative.
Why won’t the ISO file open?
The ISO may be incomplete, damaged, or incorrectly downloaded. Try downloading it again from the software provider. If a checksum is available, compare it with the value provided by the publisher.
Why can’t I find setup.exe?
Not every software package uses a file named setup.exe. Check the ISO’s folders and look for another installer file or follow the software publisher’s installation instructions.
Can I install software directly from an ISO?
You normally access the ISO’s contents first. Mount the image or extract its files, then run the included installer.
Do I need 7-Zip to install an ISO?
No. Windows 10 and Windows 11 can usually mount ISO files without requiring 7-Zip. An extraction utility is mainly useful when mounting is unavailable or when you prefer to extract the files.
Can I delete the ISO after installation?
Yes, if you no longer need it. However, keeping the ISO can be useful if you need to reinstall the software later.
Can I use an ISO to install an operating system?
Installing an operating system from an ISO is different from installing a normal application. An OS ISO may need to be written to bootable media or used through a specific upgrade or installation process. Follow the operating system manufacturer’s instructions for that process.
About the Author